We use Auth0 for our user management, authentication and authorization. At login, our spa application validates the credentials with Auth0. In return, Auth0 then sends us a JWT token with the user information and permissions for the application. We have API’s that are used to provide data to the applications that are sitting behind an Azure API Management. By default, with API management you are provided a Subscription Key that you can send in the header to validate requests but why not validate the token given by Auth0 and verify if they have the claims to access the API. In this tutorial, I will show you how to setup validation of the Auth0 token in API Management.
Auth0 Set Up
- Create an application as outlined by Auth0
- You will need to create an api for this application as well.
- Go to Applications -> APIs -> Create API (The following popup will show)
- Name the api based on your naming convention, You must chose HS256 for the signing algorithm.

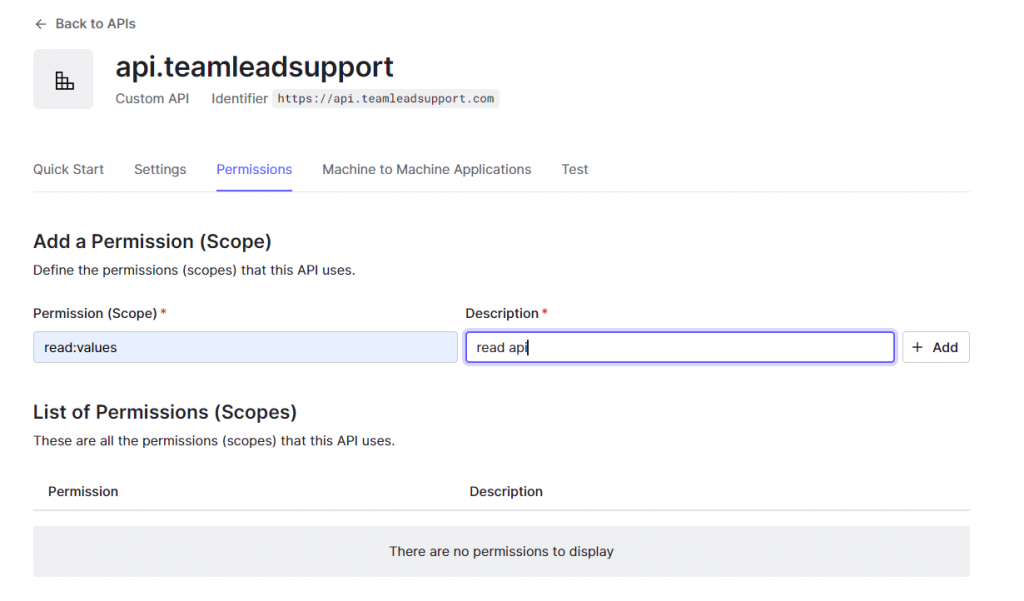
3.) Once that is done, you will need to add permissions, connect it to the application that you previously set up, as well as assign the permission to the user or roles.

4.) On the Machine to Machine Applications tab, authorize the application that you set up in step 1 to use the api. This will add the permissions to the bearer token.
5.) Record the Identifier and Signing key. Also, Enable RBAC and Add permissions to access token.

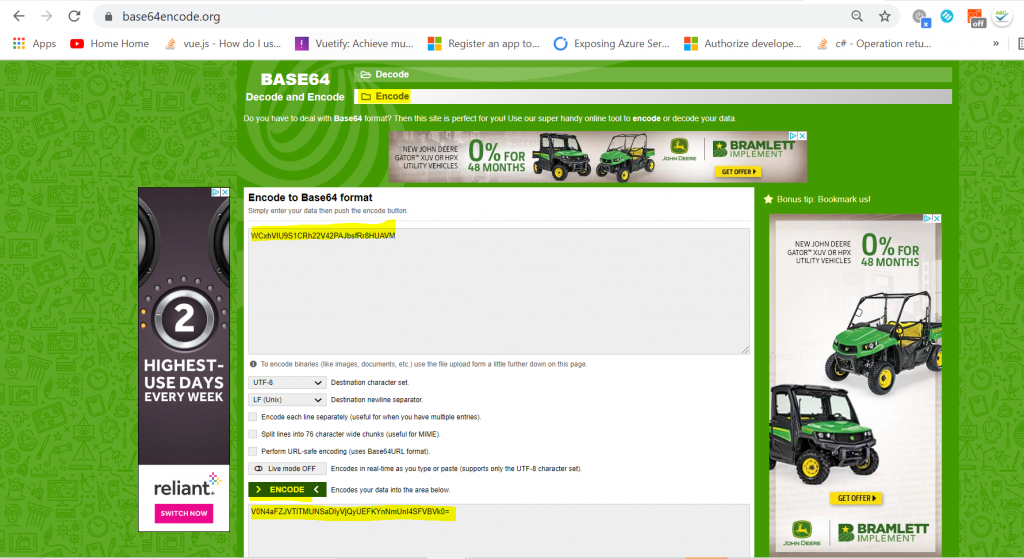
6.) We need to encode the signing key to base 64. Go to www.Base64encode.org. Chose the encode option, paste the signing secret into the top text box, Press the encode button and record the encoded value.

API Management
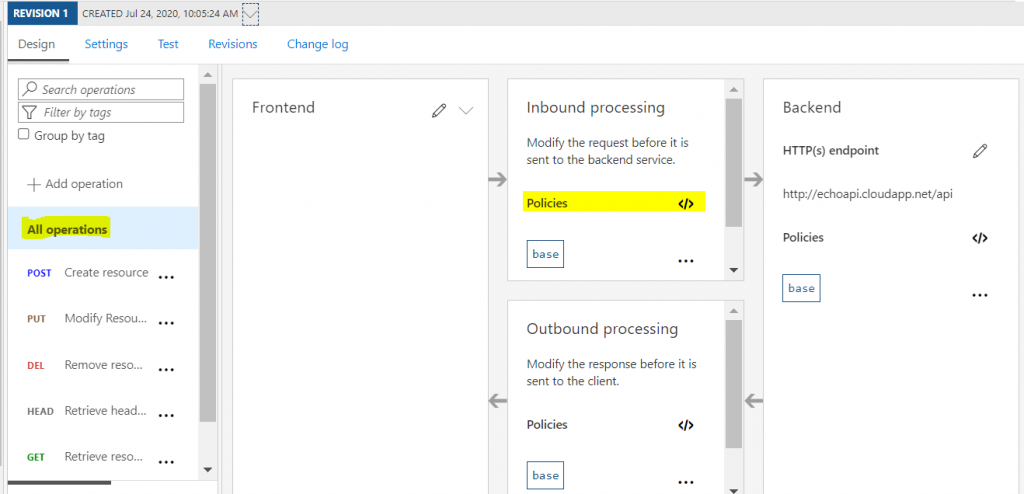
Go to Azure API Management and find your api that you would like to add this policy to.
Add the encode signing key, audience and domain
<validate-jwt header-name=”Authorization” failed-validation-httpcode=”401″ failed-validation-error-message=”Server is unavailable” require-scheme=”Bearer”>
<issuer-signing-keys>
<key>V0N4aFZJVTlTMUNSaDIyVjQyUEFKYnNmUnI4SFVBVk0=</key>
</issuer-signing-keys>
<decryption-keys>
<key>V0N4aFZJVTlTMUNSaDIyVjQyUEFKYnNmUnI4SFVBVk0=</key>
</decryption-keys>
<audiences>
<audience>https://api.teamleadsupport.com</audience>
</audiences>
<issuers>
<issuer>https://testtenant.auth0.com/</issuer>
</issuers>
<required-claims>
<claim name=”permissions” match=”any” separator=” “>
<value>read:values</value>
</claim>
</required-claims>
</validate-jwt>
Chose all operations and click on the policies

Paste the validation-jwt as the first item in the policies and press save.

Go to the settings tab and turn off the subscription key and set security to none.

Set up is now complete! You can now send requests to the api with the token in the header.
